Changing logo
There are two options:
- Add logos to the welcome screen of the survey. These logos will only show on that screen, and the McMaster one will keep showing on the top left corner during the rest of the survey.
- Replace the logo image that appears in the top left of all the survey screens (the McMaster logo in the McMaster theme) with your own logo image. Note that this is a single image file, so you would have to create one image that includes all the logos you want, with a size that fits that header height.
Ensure images are accessible. Resources suggested by the McMaster Accessibility Hub:
- Assessing colour contrast & colour combination tools
- Writing alternative text for images
- SensusAccess - transforms text & image-based files into different formats
Option 1: Add logos to welcome screen
Steps:
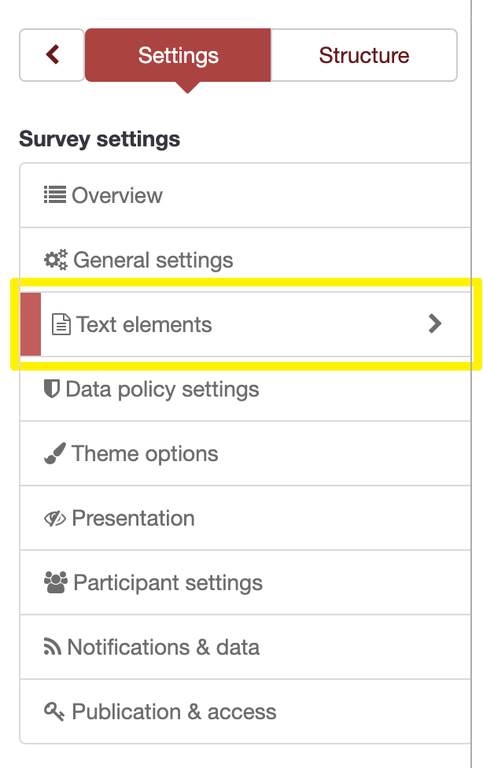
- Go to Text elements
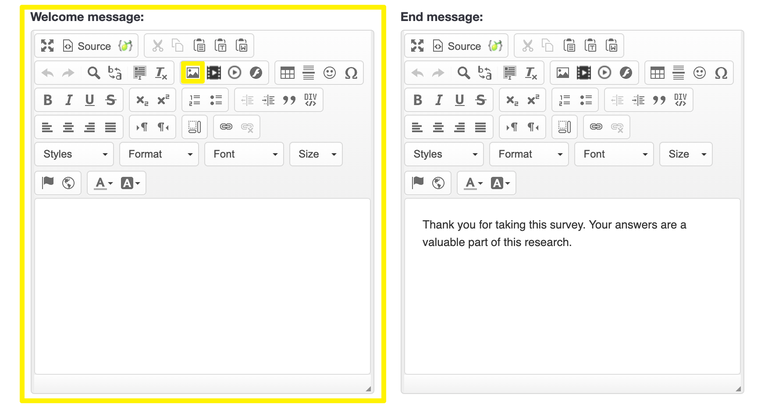
- Insert logo in the Welcome message area.


- Set up your survey to show the Welcome screen.
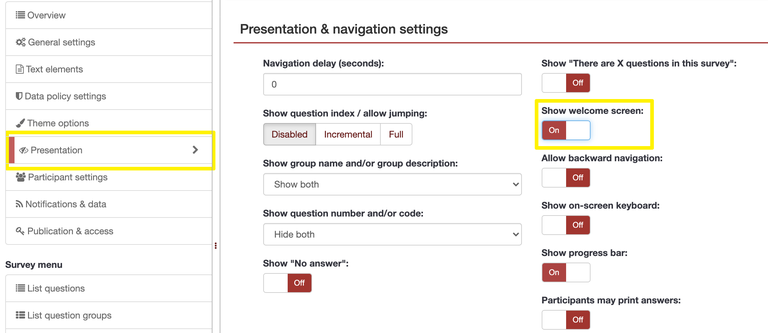
- Go to Presentation
- Turn Show welcome screen on

Option 2: Replace logo image for the survey.
As a reference, the McMaster logo is 500px (width) x 274px (height).
- Upload your custom logo image to your survey Resources area.
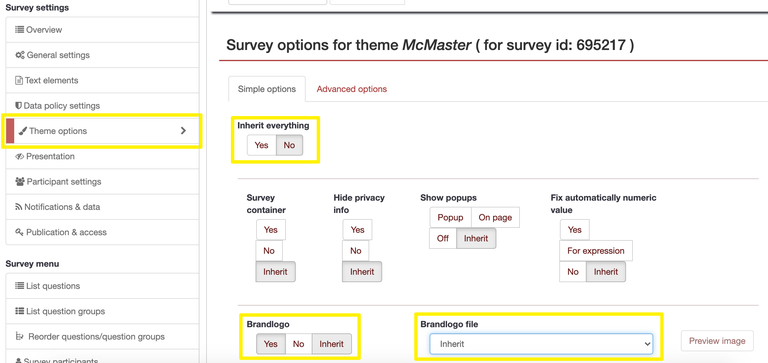
- Go Theme options
- Set Inherit everything to No.
- Set Brandlogo to Yes
- From Brandlogo file dropdown, select the custom logo file you uploaded at the beginning (it will show towards the bottom of the list, under Survey).
- Click Save button at the top right of the screen.
- Test your survey to check that the logo displays correctly on the top left corner of your survey.

