Mapping a network drive
IMPORTANT: If you are connecting from off-campus and are having trouble connecting, first check to see if you are on the McMaster VPN. Many campus network shares are only accessible from a McMaster IP address.
Windows
Browsing available network shares
You may browse which network shares you have permission to access. If you already know the network share you want to connect to, please skip to the next section.
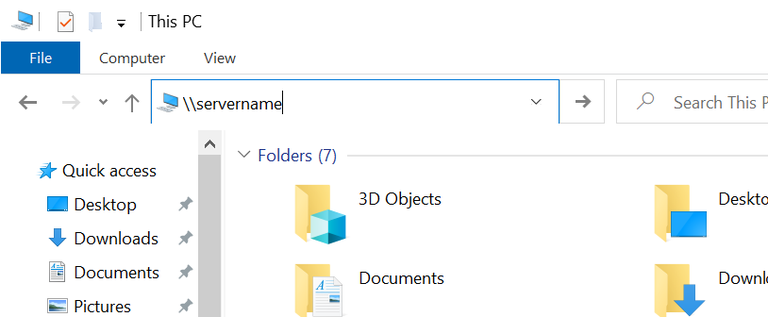
- Open File Explorer (Win + E) and type the server into the address field, paying close attention to use the proper syntax (as shown below):
\\servername
You might need to use \\servername.mcmaster.ca if \\servername fails. - You will then be prompted to enter your credentials. Please see the Enter network credentials section below for further details.
Mapping the share
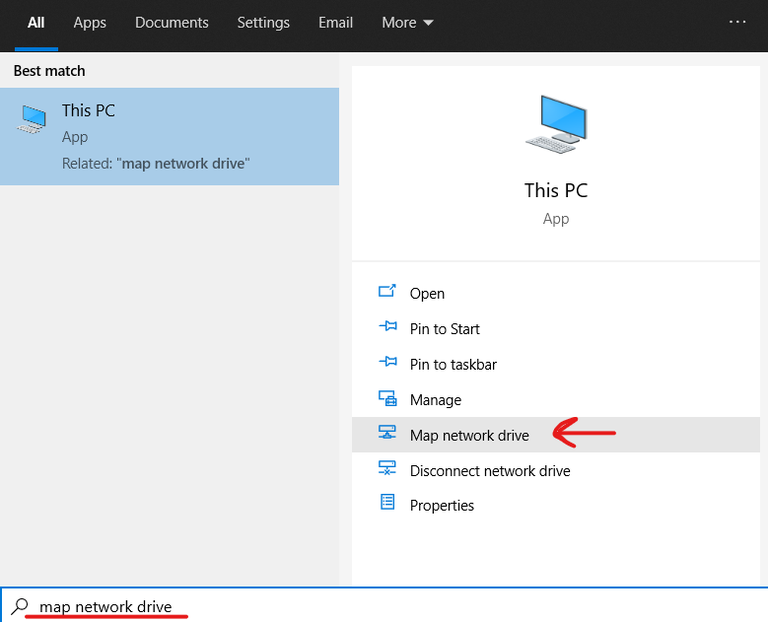
- Press the Windows key and type
map network drive.
Click on "Map network drive" (indicated by red arrow in picture above).
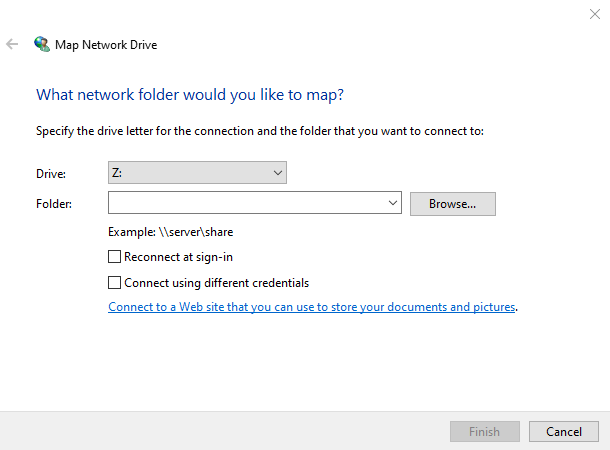
If your search result does not show the above screen, please perform steps 1 thru 4 on this Microsoft site, and then continue from step 2 below. - Use the Drive dropdown menu to select a desired drive letter for the network share you are about to map.

- Type the UNC path to the network share you want to map into the Folder field (using the format
\\servername\sharename). You can also use the dropdown button at the right of the Folder field to select recent entries. - Make sure to tick Connect using different credentials. You can also tick Reconnect at sign-in if you wish.
- Click Finish to proceed.
Enter network credentials
When the Windows Security dialogue pops up, you'll want to click on More choices near the bottom of the window until you are asked for both a username and password.
If your user account on the remote server needs to be part of a domain, you should enter that information in the following format: domain\username, paying close attention to the backslash (\) character that separates the domain from your username, without spaces.
On the other hand, if your current machine is not on the same domain as your remote server, you can specify a non-domain username in the format \username.
Sometimes you will be asked for your username and password twice, even though you're sure you entered the correct password. Don't worry, just do it again.
After you're sure that everything's working, you could make Windows remember your credentials by ticking the box for "Remember my credentials".
macOS
On macOS, the connection behaviour is pretty consistent and straightforward.
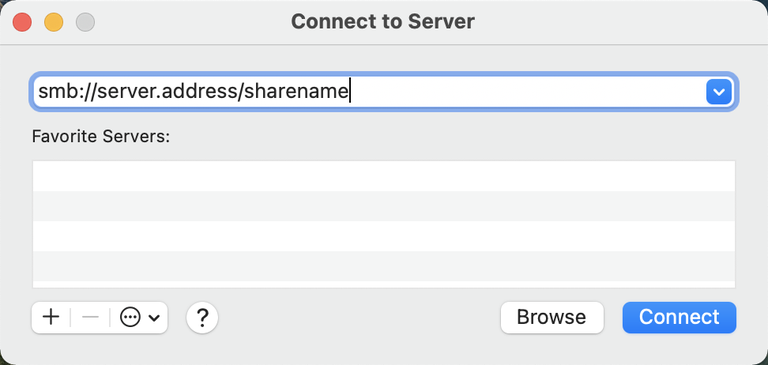
- From the Finder app, press
⌘ Kto open the Connect to Server dialog.
- Enter the address to the server and share you wish to connect to, using the format:
smb://server.address/sharename
If your user account on the remote server needs to be part of a domain, you should enter that information in the following format: domain\username, paying close attention to the backslash (\) character that separates the domain from your username, without spaces.
On the other hand, if your current machine is not on the same domain as your remote server, you can specify a non-domain username in the format \username.
